How To...
Wire Access Control with ADA openers using a BR-3
Access Control with ADA Buttons using BR-3 Relay Module
This method assumes the door opener does not have programmable inputs and outputs thereby using the BR-3 module to provide the delay between door unlock and door open, OR you do not have the ability to program the door opener, OR you don't want to mess with another trades equipment. The desing below is shown with all ADA buttons being hardwired.
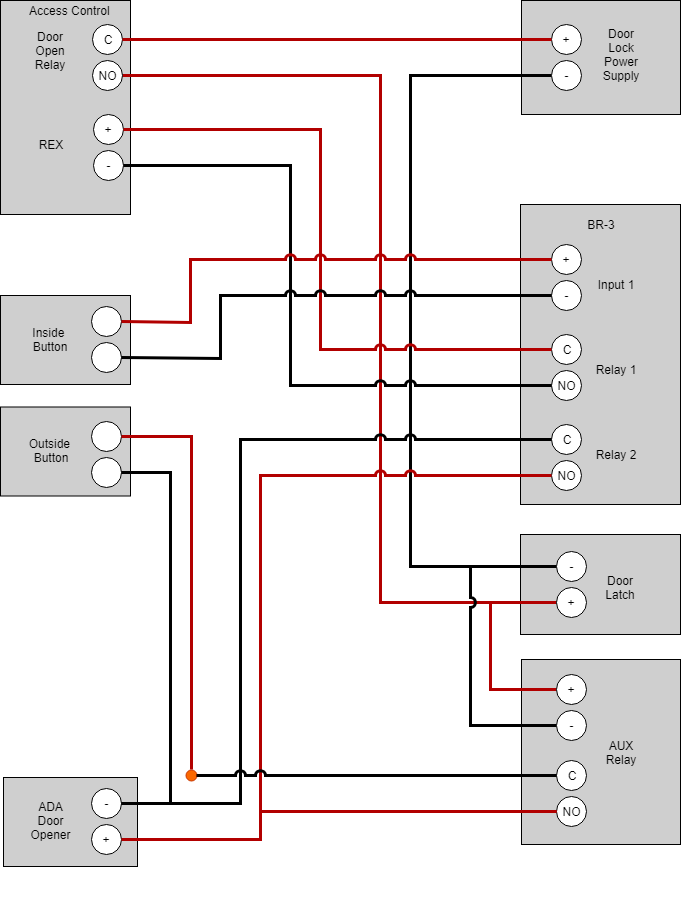
This wiring diagram illustrates a typical access control configuration for incorporating an ADA door opener with inside and outside door opener buttons. There are many other methods that can be used to achieve the same results, but there is 1 basic fundamental for any access control system with ADA doors.
The outside door open button must be disabled until valid credentials are accepted by the access control system.
In this example, you see that if the inside button is pressed, the BR-3 Module input is triggered. This closes relay 1 which triggers the REX input to the access control system. This in turn unlocks the door and closes the AUX relay. Relay 2 is also closed after a few seconds which triggers the door opener. The delay in closing relay 2 is to give the access control time to unlock the door, then the door opener is triggered.
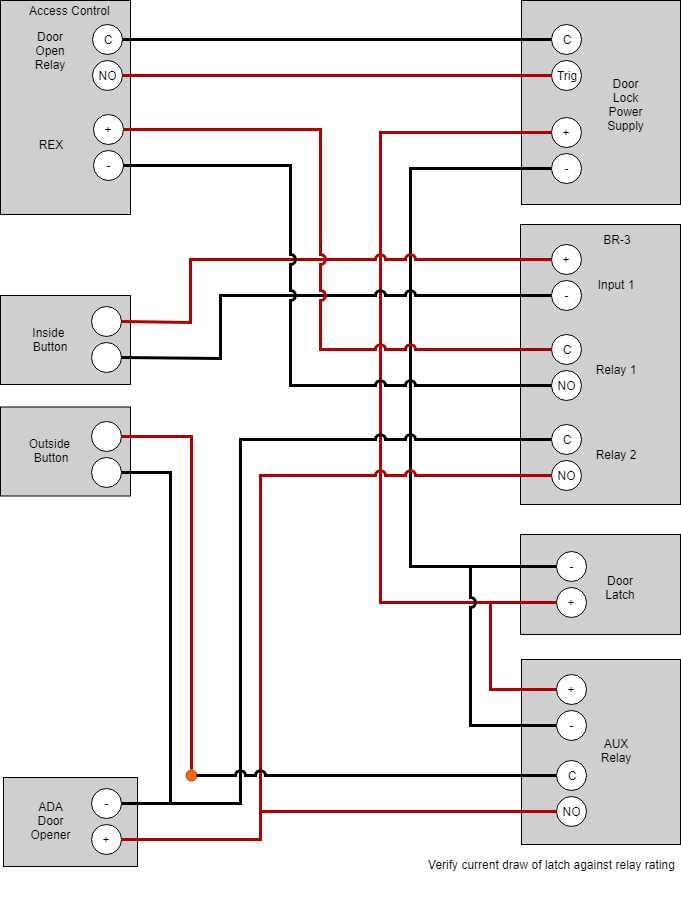
The AUX relay prevents the outdoor ADA button from working unless the user presents valid credentials to the access control system. It is important that the door strike time be long enough for a user to present an access card or enter a code and then get to the ADA button.
Variations: